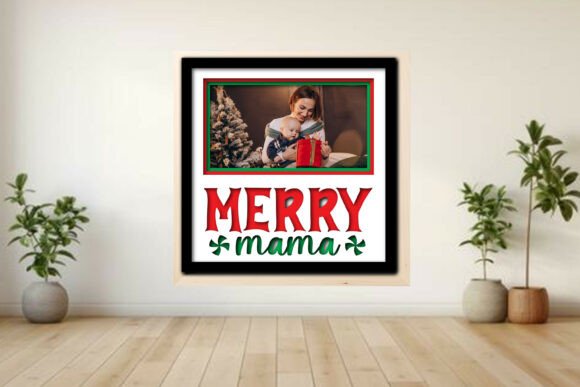
3D MERRY Text and Quilting Directions
Creating a holiday decoration that stands out often requires more than just standard stitching. The 3D MERRY Text and Quilting-Directions project offers a unique opportunity to elevate your embroidery skills by combining tactile texture with traditional quilting techniques. This design features the word "MERRY" rendered in raised 3D foam, framed by a classic quilted border pattern. For crafters looking to add depth and dimension to their work, this approach transforms a simple coaster or ornament into a sophisticated piece of textile art. Even if you have never worked with 3D foam before, the process is surprisingly accessible, making it an ideal choice for advanced beginners ready to expand their creative toolkit.
Why Dimension Matters in Holiday Embroidery
The primary advantage of utilizing the 3D MERRY Text and Quilting-Directions lies in its ability to create visual impact through physical texture. Flat embroidery, while beautiful, often blends into the background fabric. By introducing a layer of foam beneath the text stitches, the letters physically rise from the surface, catching light and shadow in ways that flat thread cannot. This "pop" effect draws the eye immediately, ensuring your creation commands attention on a holiday table or as part of a gift presentation.
For small business owners and hobbyists selling handmade goods, this added dimension can significantly increase perceived value. A coaster or wall hanging with raised lettering feels more substantial and professionally crafted. It suggests a higher level of effort and skill, allowing creators to justify premium pricing or simply delight recipients with a gift that feels unique and custom-made. The combination of the soft, padded text against the structured quilted border creates a pleasing contrast that appeals to a wide range of aesthetic preferences.
Mastering the Basics: A Beginner-Friendly Approach
Many crafters hesitate to try 3D embroidery due to misconceptions about complexity. However, the workflow for this specific design is streamlined to ensure success even for those with limited experience. The key is preparation. Unlike standard embroidery where you might stitch directly onto fabric, this project requires building a sandwich of materials before the machine ever touches the hoop.
The process begins with assembling your layers: a backing fabric, a low-loft cotton batting, and a top fabric. Using basting spray or fabric glue to hold these layers together is crucial. This step prevents shifting during the quilting phase, which is essential for maintaining the crisp lines of the border pattern. Once the base is secure, the 3D foam is placed precisely where the text will appear. Because the foam is flexible, it conforms easily to the hoop without wrinkling, provided it is cut to the correct dimensions—typically 1.5 inches by 4 inches for this design.
Once the machine runs the design, the result is immediate gratification. The estimated time to complete the entire project is less than one hour, making it a perfect weekend activity or a quick addition to a holiday crafting session. This efficiency allows you to produce multiple items without sacrificing quality, which is particularly beneficial for those creating sets of coasters or matching ornaments for friends and family.
Gathering Your Tools and Materials
Success with the 3D MERRY Text and Quilting-Directions depends heavily on having the right supplies prepared in advance. While the list may seem extensive, most items are staples in any well-stocked sewing room. You will need an embroidery machine capable of handling slightly thicker layers and a standard sewing machine for finishing edges if necessary.
- Hoops: A 5 x 5 or 5 x 7 hoop is required to accommodate the design area comfortably.
- Stabilizers: Flexible fabric stabilizer is essential to support the weight of the foam and prevent puckering.
- Fabrics: Prepare a top fabric and backing fabric, both measuring at least 7 x 7 inches to ensure enough material extends beyond the hoop.
- Batting: A low-loft cotton quilting batt measuring 6 x 6 inches provides the necessary cushion for the quilted border without adding excessive bulk.
- 3D Foam: Cut a piece of 3D foam to 1.5” x 4”. Select a color that closely matches your embroidery thread to maintain a seamless look once stitched.
- Adhesives: Basting spray or fabric glue is non-negotiable for keeping the quilting layers aligned.
- Marking Tools: A heat erasable marking pen helps position the foam accurately before hooping.
Choosing the right colors for your top fabric and thread allows for personalization. Whether you prefer traditional reds and greens or a modern palette of golds and neutrals, the design adapts easily to your vision. The original digitization ensures that the stitch count is optimized for speed and clarity, reducing the likelihood of thread breaks or skipped stitches.
Practical Applications and Creative Customization
The versatility of this design extends far beyond a single use case. While the instructions outline a coaster, the same technique applies to placemats, tote bag accents, pillow covers, and even decorative wall hangings. For entrepreneurs, producing a line of coordinated holiday items using the 3D MERRY Text and Quilting-Directions can diversify a product catalog quickly. The short production time means you can fulfill orders rapidly during peak shopping seasons without overwhelming your schedule.
Educators and workshop leaders can also utilize this project to teach students about layering, tension management, and the mechanics of 3D effects. It serves as an excellent bridge between basic embroidery and more complex mixed-media projects. The clear distinction between the quilting stitches and the text stitches helps learners understand how different stitch types serve different functions within a single design.
However, there are considerations to keep in mind. The thickness of the final product is greater than standard embroidery, which may affect how it fits into certain frames or storage solutions. Additionally, while the foam adds height, it does require careful washing if the item needs to be laundered; hand washing or gentle cycles are recommended to preserve the integrity of the raised text. Comparing this method to other dimensional techniques, such as puff paint or appliqué, reveals that 3D foam offers a cleaner finish with less post-production cleanup.
Final Thoughts on Elevating Your Craft
Incorporating 3D elements into your embroidery repertoire opens new doors for creativity and professional growth. The 3D MERRY Text and Quilting-Directions project demonstrates that high-impact results do not require hours of labor or expert-level mastery. By following the structured steps and using the recommended materials, you can achieve a polished, professional look that enhances any holiday decor.
Whether you are making a gift for a loved one or expanding your small business inventory, the ability to create textured, eye-catching designs sets your work apart. The satisfaction of seeing the letters rise from the fabric, framed by a neat quilted border, is a rewarding experience that encourages further experimentation. As you master this technique, you will find yourself confident in tackling even more ambitious 3D projects, turning simple ideas into tangible, memorable creations.