Create a Festive "Naughty and I Know It" Layered Shadow Box Frame with Your Laser Cutter
Holiday decorating is often about more than just adorning the tree; it is about curating memories and creating tangible keepsakes that capture the spirit of the season. One of the most delightful ways to blend humor, nostalgia, and craftsmanship is by creating a custom "Naughty and I Know It" photo frame shadow box. This project transforms simple digital files into a stunning three-dimensional piece of decor that serves as a conversation starter during holiday gatherings. Whether you are a seasoned laser engraving enthusiast or a beginner looking to expand your creative horizons, this guide will walk you through the purpose, process, and potential of this layered design.
This specific project is designed for versatility, compatible with industry-leading machines like Glowforge®, xTool®, and OMTech. Furthermore, for those who prefer cutting without burning, the design includes score lines compatible with Cricut® and Silhouette® machines. By utilizing a layered approach, you can create depth and visual interest that flat frames simply cannot achieve.
The Art of Layered Shadow Boxes: Why Depth Matters
In the world of DIY home decor, the shadow box has evolved from a simple display case for collectibles into a sophisticated medium for storytelling. The "Naughty and I Know It" concept relies heavily on the interplay between text, imagery, and physical space. A standard 2D frame holds a photo, but a layered shadow box invites the viewer to look closer. The separation between the backer, the frame mat, and the decorative accents creates a genuine 3D effect that mimics the whimsical nature of Christmas itself.
The significance of this project lies in its ability to personalize generic holiday themes. Instead of buying a mass-produced item, you are crafting a unique vessel for your family's history. The phrase "Naughty and I Know It" adds a playful, cheeky tone that is perfect for displaying candid photos of children, pets, or even the adults who may have indulged a bit too much in holiday treats. It turns a simple memory into a narrative moment.
How Layering Enhances Visual Appeal
When constructing this frame, the layers are not random; they are strategically placed to guide the eye. Typically, the design consists of:
- The Backer: This forms the foundation of the project, providing structural support and a contrasting background color if desired.
- The Frame Mat: This layer defines the boundaries of the photo area, creating a clean window for your cherished image.
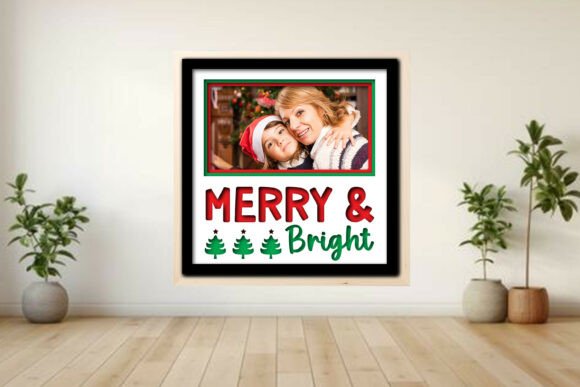
- Decorative Accents: Elements such as the "Santa Squad" text, miniature trees, and stars float above the base, adding texture and dimension.
By stacking these components, light interacts differently with each surface, casting subtle shadows that enhance the festive atmosphere. This technique is particularly effective when using materials like plywood or acrylic, where the natural grain or transparency adds another layer of complexity to the final piece.
Compatibility Across Cutting Technologies
One of the greatest advantages of this digital download is its broad compatibility. The modern maker ecosystem is diverse, ranging from CO2 laser cutters to vinyl cutting plotters. Understanding how this file set adapts to different machines is crucial for success.
Laser Cutting and Engraving: Glowforge, xTool, and OMTech
For owners of laser systems, the file package is optimized for precision. The design utilizes a color-coded system specifically tailored for software like LightBurn. In this workflow:
- Red lines indicate full cuts, separating the pieces from the raw material.
- Blue lines represent scoring lines, which are essential for folding the frame edges without breaking the material.
- Black areas denote engrave zones, allowing for intricate details on the wood or glass surfaces.
This color coding ensures that the machine interprets the vector data correctly, minimizing setup time and reducing the risk of errors. Whether you are using a desktop Glowforge or a larger format OMTech, the scalable nature of the SVG and DXF files means you can adjust the dimensions to fit various photo sizes while maintaining perfect proportions.
Vinyl Cutting: Cricut and Silhouette Integration
If you do not own a laser cutter, the project remains accessible through vinyl cutting machines. The included files feature optional score lines that allow you to cut the shapes out of cardstock, thin wood veneer, or foam board. While you won't be able to engrave the texture, you can still assemble a beautiful frame by adhering the cut layers together. This makes the project inclusive for crafters who rely on heat-transfer vinyl (HTV) or die-cutting techniques, proving that high-quality decor does not require expensive industrial equipment.
Customization Options: Making It Uniquely Yours
A key feature of this "Naughty and I Know It" template is its flexibility. No two families are alike, and your frame should reflect that individuality. The design offers four distinct photo layouts: single, double, triple, or six-photo configurations.
Choosing the Right Layout
Selecting a layout depends on the story you want to tell. A single photo layout is ideal for a standout portrait, perhaps a funny selfie from last year's party. The two or three photo options allow for a chronological sequence, showing the progression of a child's "naughty" antics over the years. For larger families, the six-photo grid becomes a collage of memories, capturing the entire "Santa Squad" in one cohesive piece.
Beyond the layout, the project encourages material experimentation. While 3 mm plywood is the recommended starting point for laser users, you might choose birch plywood for a lighter finish or MDF for a smooth, paintable surface. The fully scalable nature of the files means you are not locked into standard sizes; you can resize the frame to fit non-standard photos or even small prints from your phone.
Assembly and Material Considerations
Creating the physical object requires attention to detail, particularly regarding material preparation and assembly. The digital download includes a comprehensive PDF guide that walks you through the process step-by-step. However, understanding the nuances of the materials is equally important.
Understanding Material Settings
It is vital to remember that laser settings vary significantly between machines. A setting that works perfectly on an xTool F1 may burn through a Glowforge X instantly. The project notes emphasize running a material test first. This involves cutting a small square or line on a scrap piece of your chosen material to determine the optimal power and speed. This precaution prevents wasted material and ensures clean edges, which are critical for a professional-looking shadow box.
For the 3 mm plywood commonly used in this project, the goal is to cut cleanly without charring the edges excessively. If you are using a darker wood, the contrast between the engraved black lines and the natural grain can create a striking vintage aesthetic. Conversely, lighter woods offer a crisp, modern look that highlights the white or silver text of the "Naughty and I Know It" slogan.
The Assembly Process
Once the pieces are cut, the assembly is straightforward but requires patience. The process typically involves:
- Sorting the layers according to the color-coded guide.
- Folding the scored edges of the frame mat to create the lip that holds the photo.
- Applying adhesive to the backer to secure the inner layers.
- Positioning the "Santa Squad" text and tree/star accents to ensure they are centered and level.
- Inserting the photograph and securing the backing.
Using a glue gun or strong craft adhesive is recommended for durability. Taking the time to align the layers perfectly before the glue sets is the difference between a amateurish craft and a gallery-worthy piece.
Common Misunderstandings and Clarifications
As with any digital download, there are common assumptions that can lead to disappointment if not clarified beforehand. First and foremost, this product is a digital download only. There is no physical product shipped to you. You receive the files necessary to create the frame yourself. This model empowers makers but requires access to the appropriate tools.
Additionally, the mockup images seen in the listing are for illustrative purposes only. They showcase the potential of the design but do not include the actual photographs used in the examples. You must supply your own images. Another frequent question concerns the file formats. The package includes SVG, DXF, PDF, EPS, PNG, and LBRN2 files. The LBRN2 file is specific to LightBurn software, offering a pre-configured job file for convenience, but the other formats ensure compatibility with a wide range of design software.
Bringing Holiday Cheer into Modern Life
In our increasingly digital lives, the act of physically creating something holds immense value. Building a "Naughty and I Know It" shadow box is more than just a craft project; it is a ritual that connects us to the traditions of the past while utilizing modern technology. It fits seamlessly into the contemporary lifestyle where personalization is prized over mass production.
This project serves as an excellent educational tool for teaching children about design, geometry, and the basics of manufacturing. It also provides a meaningful activity for adults looking to disconnect from screens and engage in hands-on creativity. The resulting decor piece acts as a focal point in the home, sparking conversations and bringing smiles to guests' faces throughout the holiday season.
Whether you are gifting this frame to a friend, hosting a holiday party, or simply refreshing your own mantel, the layered shadow box offers a charming and sweet way to display memories from Christmases past. By following the provided guides and leveraging the capabilities of your laser or cutting machine, you can transform simple digital vectors into a lasting symbol of holiday joy and familial love.