Tis the Season Photo Frame Shadow: A Guide to Flawless Layered Holiday Decor
There is a distinct warmth that comes from displaying holiday memories in a custom-made frame, especially one with depth and dimension. The Tis the Season Photo Frame Shadow project offers exactly that: a fun, layered shadow box design that transforms flat photographs into charming 3D keepsakes. Whether you are using a Glowforge®, xTool®, or OMTech laser cutter, or perhaps a Cricut® or Silhouette® for scoring, this project bridges the gap between digital files and tangible holiday joy. However, the difference between a professional-looking heirloom and a frustrating assembly job often lies in the details many creators overlook before they even fire up their machines.
Understanding the Layered Design Potential
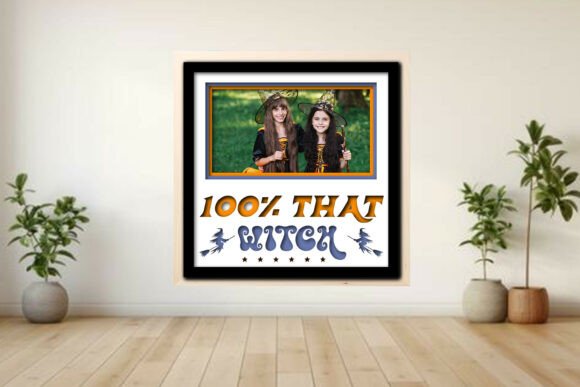
The appeal of the Tis the Season Photo Frame Shadow lies in its multi-layered construction. Unlike standard frames that simply hold a photo behind glass, this design utilizes separate layers—a backer, a frame mat, and festive accents like the "Santa squad," trees, and stars—to create a genuine shadow effect. This depth draws the eye and adds a tactile quality that mass-produced decor lacks. It is designed to be fully scalable, allowing you to adjust the dimensions to fit your specific photos, whether you choose a layout for one, two, three, or six images.
Yet, many beginners approach this project assuming that because the file is "fully scalable," they can resize it without consequence. This is a common misunderstanding that leads to distorted proportions or misaligned layers. When you scale a layered shadow box, every element must maintain its relative distance from the others. If you stretch the outer frame but forget to account for the thickness of the inner mat, your photos may not sit flush, or the decorative elements might look out of place. The key is to treat the entire assembly as a single unit during scaling, ensuring the gap between layers remains consistent enough to cast that signature shadow.
Avoiding Material and Settings Pitfalls
One of the most frequent mistakes makers encounter with projects like the Tis the Season Photo Frame Shadow is neglecting to run a material test first. The project description notes that it has been tested on 3 mm plywood, but your machine's behavior will vary based on wood density, moisture content, and lens condition. Jumping straight into cutting the final piece without a test square can result in burned edges, incomplete cuts, or scorched score lines that ruin the aesthetic.
Consider the color-coding system included in the file: red for cut, blue for score, and black for engrave. While intuitive, relying solely on these colors without verifying your software's layer management can lead to disaster. For instance, if your LightBurn settings do not correctly map the blue layer to a low-power scoring pass, you might end up cutting through the material where you intended only to create a fold line. Conversely, if the engraving power is too high, the black lines could become deep grooves rather than subtle textures, making the "Santa squad" or star accents difficult to assemble cleanly.
To avoid these issues, always create a small test grid on a scrap piece of the exact same batch of plywood you plan to use for the final project. Verify that your cut lines go all the way through, your score lines are crisp but not broken, and your engravings are visible without charring the wood excessively. This small step saves hours of frustration and ensures the final product looks polished rather than rushed.
Navigating File Formats and Software Compatibility
Digital downloads come with a variety of formats—SVG, DXF, PDF, EPS, PNG, and LBRN2—and while this versatility is a strength, it can also be a source of confusion. A common error is opening the wrong file type for your specific workflow. For example, attempting to use an SVG file in a vector laser cutter without checking for closed paths can result in erratic beam movement. Similarly, users of Cricut® or Silhouette® machines looking to utilize the score lines must ensure they are importing the correct vector data, as raster images (like PNGs) cannot be scored accurately by these devices.
If you are a LightBurn user, the included LBRN2 project file is your best starting point. It contains the pre-set layers and color codes ready for immediate use. However, do not assume these settings are universal. Even within LightBurn, different machines require different power and speed adjustments. Always review the layer list after importing the file to confirm that the "cut," "score," and "engrave" operations are assigned to the correct tools in your device profile. Ignoring this check can lead to wasted materials and a project that requires significant sanding or repair work.
Assembly and Presentation Considerations
The true magic of the Tis the Season Photo Frame Shadow happens during assembly, yet this stage is often treated as an afterthought. Because the design relies on precise alignment to achieve the 3D effect, rushing the gluing process can lead to warped frames or uneven gaps. Using too much adhesive can cause the thin plywood layers to bow, while too little can leave joints weak. It is advisable to dry-fit all pieces before applying any glue. Lay out the backer, the frame mat, and the accent layers to ensure everything fits perfectly together.
Another overlooked detail is the choice of backing material. The project includes a backer layer, but the finish you apply to the inside of the frame matters just as much as the exterior. A dark, non-reflective backing often enhances the shadow effect, making the photos pop more effectively. Additionally, remember that this is a digital download; physical photos and mockups are not included. You must have your own printed photos ready, sized precisely to the chosen layout. Printing photos that are slightly too large or too small will break the illusion of the layered design and make the frame look amateurish.
Final Checklist Before You Begin
Before you commit to cutting your precious holiday wood, take a moment to review these critical points:
- Verify Your Material: Ensure you have 3 mm plywood (or your preferred thickness) and understand how it reacts to your specific laser or cutter.
- Test Your Settings: Run a test cut and score on scrap material to fine-tune power and speed for clean edges.
- Check File Integrity: Open the SVG or LBRN2 file to confirm all layers are present and color-coded correctly for your software.
- Prepare Your Photos: Print your holiday memories at the exact dimensions required for the 1, 2, 3, or 6-photo layout you selected.
- Review Assembly Steps: Read the included simple assembly guide PDF thoroughly before starting to glue anything.
By approaching the Tis the Season Photo Frame Shadow project with preparation and attention to detail, you transform a simple digital file into a cherished family tradition. Avoiding these common pitfalls ensures that your holiday decor stands out for its craftsmanship and the beautiful memories it holds, rather than for the errors that could have been easily prevented.